Here's my travelling art and craft bag that I have decorated with gelli prints.
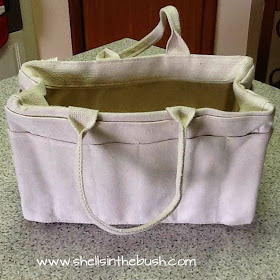
When I first saw one of these plain canvas tool bags I fell in love - it was decorated by Lucy Lampshade. Then late last year Gelli Arts® decorated one with Gelli® prints and I loved that one too! A year later I succumbed to getting one - sent all the way from the USA - many thanks to Cindy Jones Lantier!!
They can be bought at Harbor Freight - http://www.harborfreight.com/canvas-riggers-bag-38124.html
Here's how I decorated mine:
1. Gelli print fabric:
1 metre of cotton material
1 metre of iron on lining - this makes the material stronger and easier to print and sew
Gelli Arts® plate, acrylic paint, texture makes, stencils
1a. Cut your fabric just larger than your gelli plate then iron on your lining.
1b. Print your fabric and decorate it to suit you. I used normal acrylic paint - in some places I did not have enough paint on the plate or the paint had dried (it's summer down under). Experiment, use fabric paint if you have it as you may get a better result.
The latest Gelli Arts® video demonstrated how to use foam sheets to make great texture on your plate so I tried this and loved my result.
Here are my Gelli® printed fabric pieces:
The feather stencil comes from Sarah Jane at Rainbow Gecko Gallery. Thank you!
2. Make your panels:
2a. I made this stencil and used a lead pencil to outline my panel.
2b. When I cut out my panels I added half an inch to the lead pencil stencil outline for my seam.
2c. I folded the material along the pencil line then I ironed down the seams.
2d. I sewed along the seams/edges.
3. Glue your panels to the bag:
I used fabric glue but you could use a hot glue gun. Be generous with the glue. I held the top of the panels down with pegs but this has left an indentation on some of the panels.
Voilà!!
I love my bag!!! It is several hours work but if you don't have a sewing machine then glue down your seams before gluing the panels to the bag. the side panels are just one panel as I really liked how the print turned out and wanted to show off the whole section and not cut it up.
When I first saw one of these plain canvas tool bags I fell in love - it was decorated by Lucy Lampshade. Then late last year Gelli Arts® decorated one with Gelli® prints and I loved that one too! A year later I succumbed to getting one - sent all the way from the USA - many thanks to Cindy Jones Lantier!!
They can be bought at Harbor Freight - http://www.harborfreight.com/canvas-riggers-bag-38124.html
Here's how I decorated mine:
1. Gelli print fabric:
1 metre of cotton material
1 metre of iron on lining - this makes the material stronger and easier to print and sew
Gelli Arts® plate, acrylic paint, texture makes, stencils
1a. Cut your fabric just larger than your gelli plate then iron on your lining.
1b. Print your fabric and decorate it to suit you. I used normal acrylic paint - in some places I did not have enough paint on the plate or the paint had dried (it's summer down under). Experiment, use fabric paint if you have it as you may get a better result.
The latest Gelli Arts® video demonstrated how to use foam sheets to make great texture on your plate so I tried this and loved my result.
Here are my Gelli® printed fabric pieces:
The feather stencil comes from Sarah Jane at Rainbow Gecko Gallery. Thank you!
2. Make your panels:
2a. I made this stencil and used a lead pencil to outline my panel.
2b. When I cut out my panels I added half an inch to the lead pencil stencil outline for my seam.
2c. I folded the material along the pencil line then I ironed down the seams.
2d. I sewed along the seams/edges.
3. Glue your panels to the bag:
I used fabric glue but you could use a hot glue gun. Be generous with the glue. I held the top of the panels down with pegs but this has left an indentation on some of the panels.
Voilà!!


