Pages

Saturday, 27 September 2014

Molly - Gelli Print Hat Girls

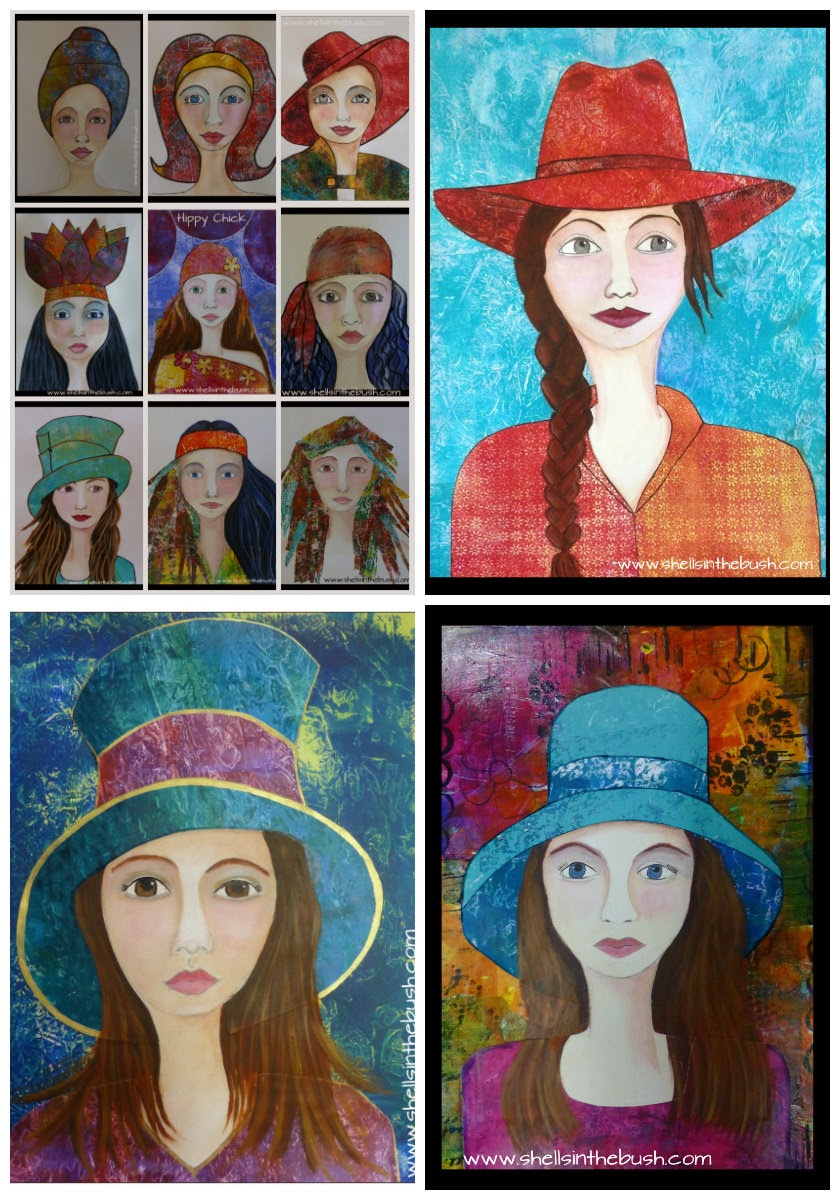
Molly is another one of my gelli print hat girls.


Here are some evolution pics:


I was inspired by Andrea Matus DeMang to try a colourful background, normally I prefer a plain background so the gelli print clothes stand out...


Some of my Girls with Hats/Headwear:
 

Here is my first girl with a hat from April 2010, then I used scrapbooking papers, which is why I love the gelli plate as I can create my own unique papers.


PS Do you love creating gelli prints?  Want a place to discuss gelli printing?  To show off your work?  Share your ideas? Discuss the pros and cons of different paints/paper/plates/tools etc?  Get some great ideas on what to do with the thousands of prints you have created?

Then I would love you to join me at the Gelatin Printing Enthusiasts Facebook Group. This group is open to people who use a Gelli Arts Plate or who make their own gelatin plate.


Thursday, 25 September 2014

Funky Flower Power

Over the past few weeks I've been creating flowers.

Flower Power, Acrylic, 60cm x 60cm, 20" x 20"

Here are some evolution pics...


This one I added gelli print flowers to the canvas and I had some trouble with it, threw a tantrum and then covered it with white gesso, the painted over it and wiped back some of the paint and the gesso...sigh....It's not how I wanted it to turn out...I wanted to show off the gelli prints but didn't like the ones I'd chosen....

 
I grabbed some old canvases to experiment with my Funky Flowers idea...
 
This one has had many transformations from Nice Girl to Poppies and then to Funky Flowers...


This one has also had many transformations too from being part of a four some abstract landscape to more Funky Flowers....


This one too...


So I had to make a flower stencil for the gelli plate!!


And it all started when I made these postcards for a swap...


So I've been busy this month painting flowers...which is your favourite painting?

Thursday, 18 September 2014

Studio Table Untouched

The ladies from Cre8tive Klatch are encouraging everyone to join in with Seth Apter's Studio Table - Call for Particpants. The idea is to show the reality of what your creative table looks like not one designed for a magazine.


This was great timing for me because last week I built one of those shelving units all by myself - a job that's much easier with two people and I had to give my art space a tidy up anyhow.  I also planned to reveal my recently re-arranged room to you too.


For my Gelatin Printing Enthusiasts friends - I built this second shelving unit to fit all my plastic baskets/containers of my prints!! Previously they were on the floor in baskets and not in baskets!! I've shifted my desk so my papers are nice and close to me!!!

Before shot!  This was my son's room but he's moved out of home so I'm very grateful that I now have this space to use.


If you want to join in and show everyone your studio/creative table then head over to Seth's blog for more details.  And leave me a comment below so I can have a sticky beak too!!  :D

Monday, 8 September 2014

Gelli Print Lanterns and Stencil

Lanterns was theme for today - I created a gelli print collage...


then an image of a stencil came into my head so I had to make that and test it out...


I've been thinking about creating artwork based on lanterns for about a year now and when a friend posted a pic on Instagram of some lanterns and wrote Inspiration I left it....until today.

These ones are decorated...


Left  - first pull, Right - second paint layer, then remove stencil and pull print. These are ready for decorating otherwise they look like urns.

Bottom right was a clean up print - this is when you have a little bit of paint left on the gelli plate, wait for it to dry, cover with another layer paint and pull the print.  If the two colours are too close together on the colour wheel you will have trouble seeing the difference in the layers.


On black cardstock - sometimes the first layer doesn't work out too well after I take the stencil off - right hand side.

Since both sides of the stencil end up with paint on them I put the stencil between two sheets of paper after I've taken it off the gelli plate...


and I clean the brayer on greaseproof/tracing paper - it's real cheap and soaks up the paint the best - great for clean up prints. It's also very thin and great to make gelli print washi tape out of or for using for collage and art journaling.


Finally, I decided to decorate the back of some envelopes which I'll use to mail out the Gelli Print Packages I sell in my Etsy store.


PS  Do you love creating gelli prints?  Want a place to discuss gelli printing?  To show off your work?  Share your ideas? Discuss the pros and cons of different paints/paper/plates/tools etc?  Get some great ideas on what to do with the thousands of prints you have created?
Inspire and be inspired as a part of the Gelatin Printing Enthusiasts Facebook Group. I would love for you to join me there.


Sunday, 7 September 2014

Shells' Sunday Snippets

Sunday Snippets (started by {tinniegirl}) - My week in photos... A collection of photos from your week. No need for words. Let the pictures tell your story.


29 Faces in September 2014


Monday, 1 September 2014

One Month to Go

until BlogtoberFest 2014!!!


BlogtoberFest is a personal challenge to blog each day for the 31 days in October.  It can be as simple as posting a photo with no words for Wordless Wednesday or you can write about you, your family, your art/craft/writing/photography.  If you miss a day it's no big deal, I can assure you that the BlogtoberFest Police will not be coming after you as they are too busy writing their own blogs and popping over to read other people's.

This isn't a blog hop so you don't have to worry about having time to get around to visit everyone's blog and leave a comment.  It would be great if you could visit a few during the month though just to encourage everyone along and give them some support.  I will try to visit everyone and look forward to reading your blog and meeting new bloggers.

This is the button and the codes can be found on the BlogtoberFest 2014 Page above.

Some ideas on what to blog about - when I was blogging regularly I used to blog according to days of the week so here are some ideas:

Monday:  Mosaic Monday - make a photomasiac to show and write about
 
Tuesday: Talkative Tuesday - tell us about yourself

Wednesday: Wordless Wednesday - post a photo and no words

Thursday:  Thankful Thursday - write about what you are thankful/grateful for, Throwback Thursday

Friday: Friends on Friday - write about another creative you admire, Flashback Friday

Saturday: Some/Six/Seven Thoughts on Saturday, Selfie Saturday

Sunday:  Sunday Snippets (started by {tinniegirl}) - My week in photos... A collection of photos from your week. No need for words. Let the pictures tell your story.

If you have any others then please let me know so I can add them to the list. More ideas on the BlogtoberFest 2014 Page above.

There will be a Linky on the BlogtoberFest 2014 page so please add your name to that so we know where to find you.  Any problems you can email me at shellsinthebushATgmailDOTcom  Thank you so much for joining in, looking forward to reading your blogs!

Michelle